October 16, 2010
Crazy, crazy, crazy!
It has been so crazy around here! New job, weird hours, and up waaaaayy to early. Can't wait for things to settle down so I can find some kind of routine! Will spend the day tomorrow doing housework in an effort to catch up and try to get ahead at least a little. Hopefully I will be able to play in paper on Tuesday! Really, really hope so because I'm having withdrawals! Well I'm off to find something for dinner. Bye all!
October 1, 2010
Chalk Popping
This month we are going to learn how to do Chalk Popping! One of my favorite ways to make my layouts or cards unique. So that's what we are going to do!!
For this technique you need:
White Cardstock
Embossing Buddy
Favorite Stamp
Embossing Pad
Decorating Chalks

Step 1
Rub your embossing buddy over the area of cardstock that you are going to stamp your image on.
Step 2
Using embossing ink, ink your stamp of choice well and stamp it on the area of cardstock that you used the embossing buddy on. Make sure your image stamps well. If you are having a problem getting your image to stamp well, try putting a thin layer of foam underneath your cardstock.

Step 3
Rub your chalk applicator onto the chalk color of your choice and then gently rub the applicator over the stamped image. If you choose you can chalk your image in several different colors.

Thats it! Very simple, but it turns out beautiful! You can also be creative. Use several colors and make it as creative as you are! The skys the limit!!
September 17, 2010
Gotta get a move on!
O. K., so i'v been slacking off just a little to much. Enjoying the quiet, free time now that the girls are back in school. But, vacations over :( . Now it's time to get back into the groove of things, start posting more often, start making and adding things to my stores and all the other fun things that requires! So, on with it!
August 27, 2010
It's been while!
I realized this afternoon that I have not checked in here in a few weeks. Life has been really crazy around here! One of the last things that we have going for the summer is a vary large yard sale. Today was day one and we did very well. We still have one more day to go and then it is over!! I think I have definitely learned my lesson about collecting stuff. NO MORE STUFF! I never want to have to do another yard sale ever again! Once is enough. Once Wednesday gets here it is time for some major down time, taking a break from all of the crazy running around, and doing this, and going there and lets do this too. Thank the good Lord for the person who invented school! All right, have to get the last of this stuff priced and ready to go. See ya next time!
August 7, 2010
IT"S HERE !!!
IT"S HERE IT"S HERE IT"S HERE!!!!!

I'm so excited!! My Pazzles Machine is here!!


One whole hour later and i've already cut something!!

Now comes the sad part.... it's 11:45 pm and I have to work in the morning :(
O.K. off to bed with me!
August 1, 2010
Custom Envelopes
This month we are doing custom envelopes and even decent tasting envelope glue!
For the envelope
Patterned tissue paper
Freezer paper (near the wax paper in the grocery store)
Iron
Envelope template
(works for any size, as long as the freezer paper is wide enough)
Step 1
Place the BACK side of the tissue paper to the SHINY side of the freezer paper.
Step 2
Carefully iron them together. I only had my iron set at the highest non-steam setting. Careful not to leave the iron in one place to long or it will burn the paper.
The tissue paper fuses to the freezer paper and makes them sturdy enough to use as envelopes.
Step 3
Using your envelope template, trace it onto the envelope paper you just made, cut it out and assemble it.


For the glue
Step 2
Pour in the boiling water and mix until dissolved. Add in the corn syrup/sugar and extract, mix well. If you would like a slightly stronger flavor, you can use about another 1/4 teaspoon or so of extract.
Step 3
 Brush a thin coat on the flap of the envelope and allow to dry completely. Once the glue is dry you, lick it just like you would a regular envelope, just without the yucky face!
This month we are doing custom envelopes and even decent tasting envelope glue!
For the envelope
Patterned tissue paper
Freezer paper (near the wax paper in the grocery store)
Iron
Envelope template
(works for any size, as long as the freezer paper is wide enough)
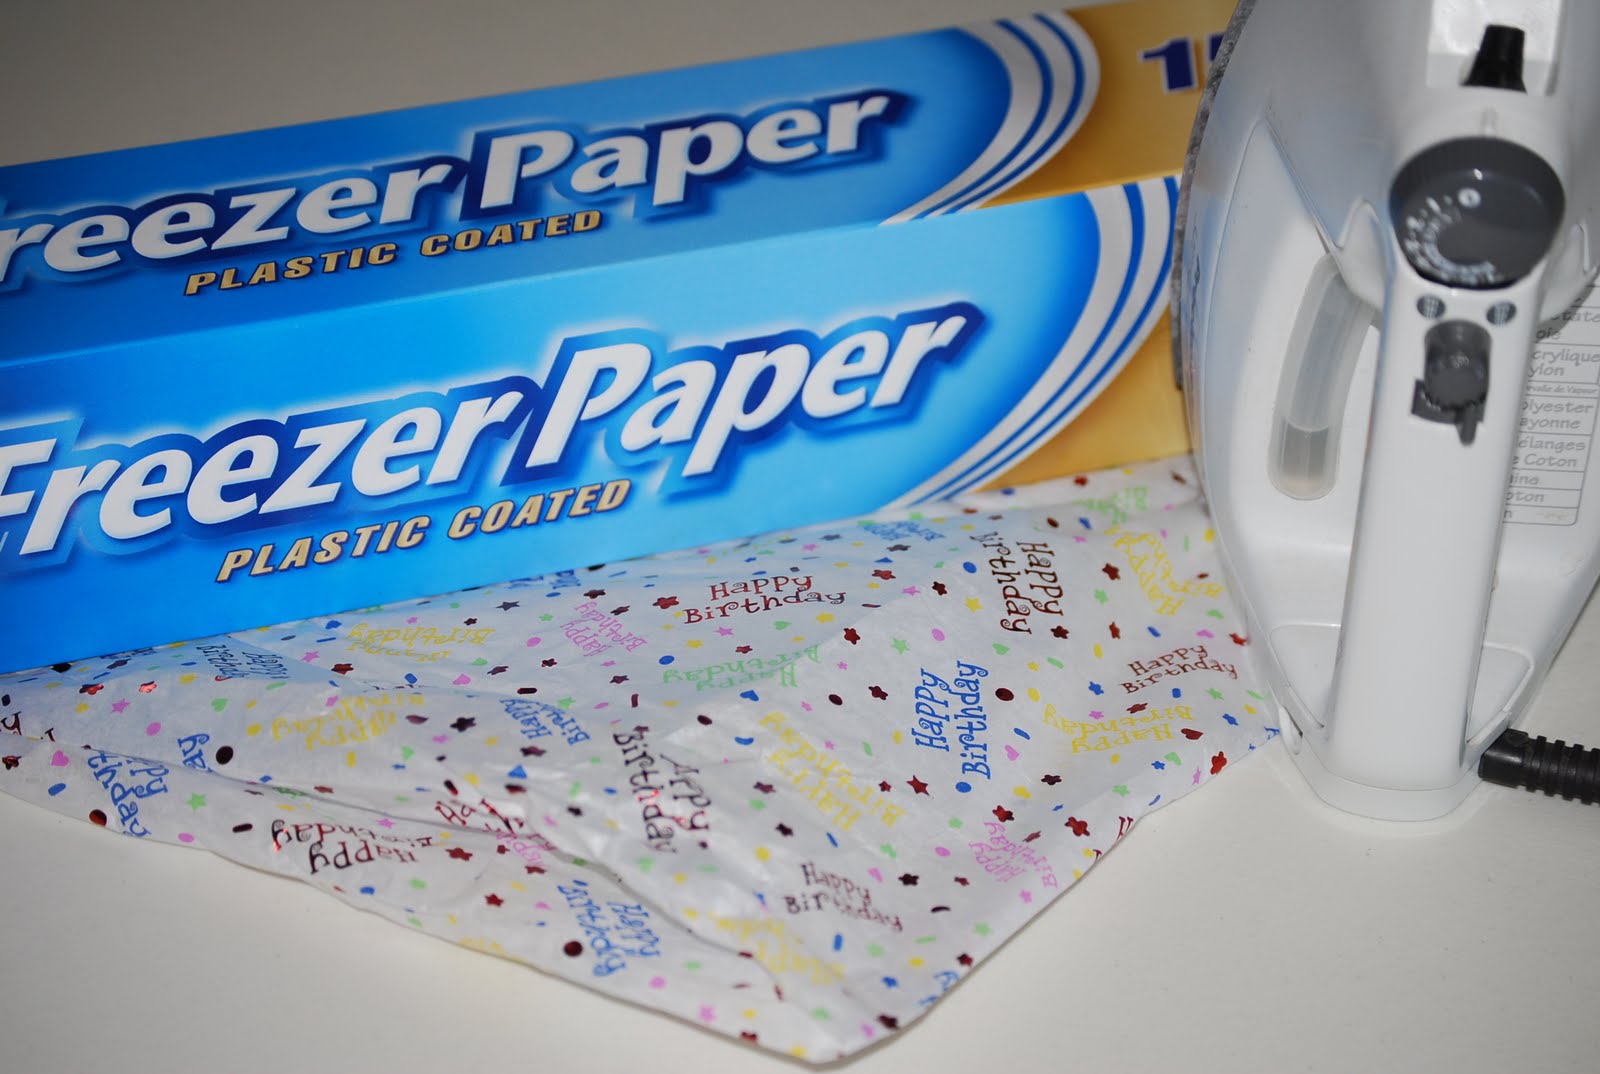 |
| Supplies for the Envelope |
Place the BACK side of the tissue paper to the SHINY side of the freezer paper.
Step 2
Carefully iron them together. I only had my iron set at the highest non-steam setting. Careful not to leave the iron in one place to long or it will burn the paper.
 |
| Tissue Paper fused to Freezer Paper |
Step 3
Using your envelope template, trace it onto the envelope paper you just made, cut it out and assemble it.


Another option you can try is to crumple the tissue paper and smooth it back out before ironing it to the freezer paper. The crinkles add another dimension to your envelope. You can also make enough to use as gift wrap! It always makes your gift extra special when the envelope and gift wrap coordinate!
For the glue
1 package unflavored gelatin
1 Tablespoon Cold water
3 Tablespoons boiling water
½ Teaspoon corn syrup or sugar
½ Teaspoon vanilla, lemon, or your favorite flavor of extract
 |
| Supplies for the Envelope Glue |
Step 1
In a small bowl sprinkle the gelatin over the Cold water and let soften for 5 minutes. |
| Gelatin dissolving in water |
Pour in the boiling water and mix until dissolved. Add in the corn syrup/sugar and extract, mix well. If you would like a slightly stronger flavor, you can use about another 1/4 teaspoon or so of extract.
 |
| Completed Glue |
 Brush a thin coat on the flap of the envelope and allow to dry completely. Once the glue is dry you, lick it just like you would a regular envelope, just without the yucky face!
The glue can be stored in the refrigerator, in an air tight container. When you are ready to use again, microwave for 20 seconds on high and mix well. Make sure that it is a uniform consistency, and brushable.
Please try this and let me know what you think! Post pics of your envelopes for others to see!
July 9, 2010
New Toy!!
So after stashing away as much of my tip money from work as I possibly could without my wonderful husband needing it for anything, I finally have enough money to buy a Pazzles machine! I can't wait for August 9 to get here! That is the day a wonderful friend of mine will be bringing it home for me! This machine does just about everything! I can't wait to share what i've done once I get it!!
June 25, 2010
Rain
It has been very warm for the last few weeks, which is fine because I hate being cold. On the news yesterday they said there was a chance of rain in the higher elevations, we are not in the higher elevations and it has been raining for hours. While its been a nice break from the warmth, I'm not looking forward to the 100 degree weather they are calling for this weekend! All I can think about is how much humidity there is going to be! But at least it will make the house work not quite so miserable. So while I clean the kids will play and mess everything up right behind me but then again what else is a kid supposed to do?! I'd like to know what you do on rainy days, please post a comment and let me know!
June 18, 2010
Pretty Paper Flowers
At this months cards class the technique was paper flowers. Never having made them before, I was very interested in trying them. I love them!! They turned out so pretty and they look almost real! So I spent yesterday making paper flowers!
 Please let me know what you think! If you want the directions, please let me know and I will email them to you.

June 15, 2010
Lots of new listings!!
As I have been slacking off so much, I spent the day listing several new items on my Etsy store! So please go have a look and feel free to post a comment here and let me know what you think!!
March 3, 2010
So cute!
I just had to share this with you! I am not a "pink" person but I absolutely love what Gabrielle did with this layout.
Layout: Meg
Here is a link to her blog if you want to see more of her stuff! http://gabriellepollacco.blogspot.com/
Once again thanks for visiting and have a wonderful day!
Layout: Meg
Here is a link to her blog if you want to see more of her stuff! http://gabriellepollacco.blogspot.com/
Once again thanks for visiting and have a wonderful day!
February 23, 2010
First Post!
After having my new blog ready for some time now, I figured I had better post something. I finally put some of the things I have made on Etsy (it’s about time!).
You can see them on the left. Please let me know what you think I would love to have some input! I know it’s short but that’s all for now! Have a great Day!
You can see them on the left. Please let me know what you think I would love to have some input! I know it’s short but that’s all for now! Have a great Day!
Subscribe to:
Comments (Atom)